Running the SharePoint 2010 IW Demo VM under Windows 8
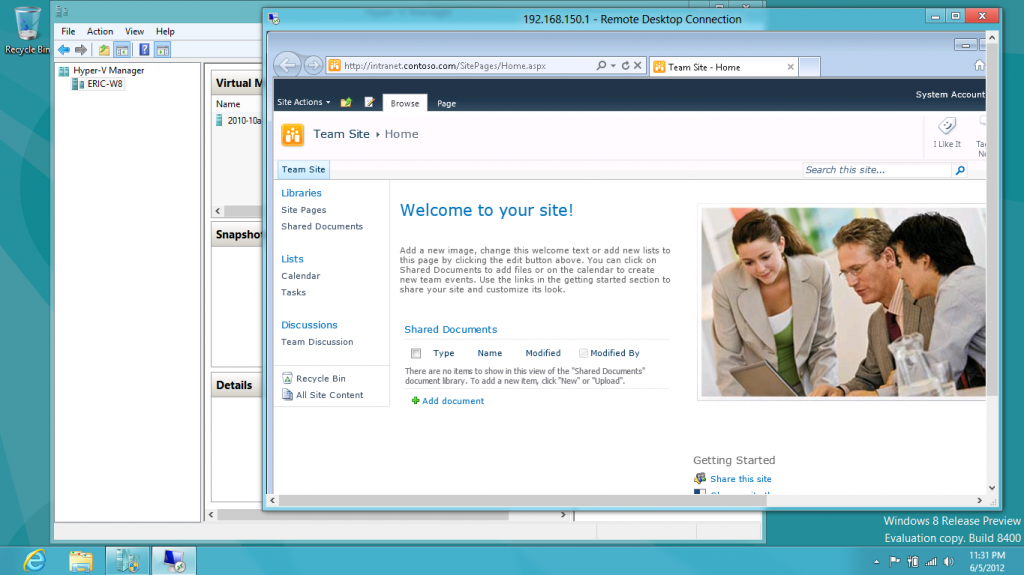
Here is something that is very cool. Windows 8 includes Hyper-V, and it is super painless to run the SharePoint 2010 IW Demo VM under Windows 8:
Further, I was able to connect the wireless adapter to the VM, and activate Windows Server 2008 using WIFI. When using this VM under WS2008, it was necessary to physically connect a wire to the computer to do this activation, since there was no way to connect a WIFI adapter so that a VM could connect to the internet.
And, even while the VM is running you can sleep the computer!!!! How awesome is that! This capability alone makes Windows 8 worth the price of admission.
In a nutshell, here are the steps:
- Make sure that you have enabled hardware virtualization in your BIOS.
- Go to Control Panel, then go to Programs and Features
- Click ‘Turn Windows features on or off’
- Check the Hyper-V node in the tree control, let it install, and then reboot.
- Download and unpack the SharePoint 2010 IW Demo VM in the usual way. The remainder of these steps are basically identical to how you setup this VM when using Hyper-V under Windows Server 2008 R2 (with the minor exception that you can use WIFI to activate WS2008 in the VM).
- Using the Virtual Switch Manager in the Hyper-V Manager, add an internal network adapter (as detailed in Virtual Machine Setup Guide.docx). This guide is available on the same page as the rest of the IW Demo VM. This network should be called ‘Internal’. Set the IP4 address, per the instructions in the Virtual Machine Setup Guide.
- Import the Virtual Machine.
- Configure the memory and/or processors as necessary or desired.
- Boot the VM, and let it stabilize. It will add drivers and need to reboot. After rebooting, and letting the machine do all of its JITting, you can start IE and see SharePoint 2010 running.
- Shut down the VM.
- Using the Virtual Switch Manager in the Hyper-V Manager, add the WIFI network adapter.
- Edit the settings for the 2010-10a VM, and add the WIFI adapter to the Virtual Machine.
- Boot the machine. If you have WIFI connectivity, you will be able to browse the web from inside the VM.
- Click Start -> Right-Click Computer -> Properties. You can activate the VM from this dialog box. You now can use this VM without interruption for 180 days.
- Shut down the VM. Remove the WIFI adapter from the settings for the VM.
- Reboot, enjoy
